Hi guys,
we are back. It took us some time to restart the blog activities. Though, we never ceased our business activities and are always open to help businesses in automating tasks. :)
Recently we had an opportunity to develop an Excel add-in to carry out custom export of data regarding the employees salary payments into a CBI (Customer to Business Interaction) format. This is a standard for the text flat file data formatting implemented by banks for batch data loading. More information could be found on www.cbi-org.eu
Preface
As it happens often small companies manage data about their employees in a kind of database which can be MS Access or even MS Excel. The easiest way to handle the task of data management at this level is to use an Excel table where insert salary data in one column. The bank requires the information to be sent in a text file which is specifically structured. the data export in this specific structure has been implemented in the add-in.
Description
In order to create the table correctly formatted for the add-in to function it's necessary to open Excel, in the menu YellowRiver/CBIexport find the button Create new sheet.
A new worksheet will be created for you.

The data table would have the following columns:
- Fiscal code of the employee
- His address
- ZIP code
- Commune he lives in
- His Bank name
- ID (currently not used)
- Name and surname
- IBAN (International Bank Account Number)
- Issue date
- Comment
- Amount
Notice that some of the columns are hidden.
Toghether with this information the add-in needs also to know the following information about your company:
- Company registration code
- IBAN to transfer money to
- Payment issuer (generally, the company's registration code)
- Bank's registration code
- Company name
- Company address
- Region
- VAT account
The add-in allows you to have a multiple choice of company registration code and bank's IBAN in case if you have different company registrations and need to vary the account you transfer money to.
When you have your table filled with data just navigate the same menu and find the button Export. The exported document is ready less than in a second and a window showing it is opened.
You will notice that the generated text file contains all the data from Excel. Now the file is ready to send to the bank on the bank's web-site.
Installation
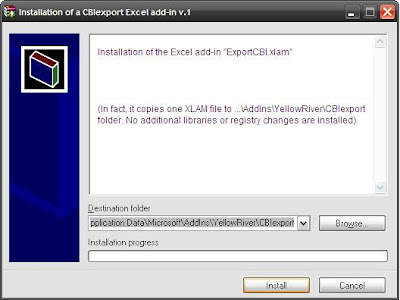
The installation of the add-in is simple as it is. Just run the downloaded file and select the path where you wish to install the add-in (the file .XLAM). The default path is OK since this is the default MS Office add-ins path.

To activate the add-in you have to go to
Excel options\add-ins\Excel add-ins and select
ExportCBI.xlam.
When you do it you might encounter a security warning.
Authorise the macro execution.
As soon as you do it you will find the afore mentioned menu YellowRiver\CBIexport in the Add-Ins tab of Excel.
Miscellaneous
The add-in is not protected so you may change it. This add-in is not universal so if you need any custom changes feel free to contact us.
The add-in's language is Italian. But I tried to give the English names for the fields. You can easily change them.
The application is freely available on our web-site
WWW.YRIVER.IT in the chapter SOLUTIONS where you can also find out how else we can make Excel work for you.
Download it
ExportCBI.exe.
Feel free to contact us if you have any ideas, suggestions and proposals.

 To activate the add-in you have to go to Excel options\add-ins\Excel add-ins and select ExportCBI.xlam.


